How to Build a Shed or Cottage Using Free or Scrounged Pallets
Learning how to build a shed is an important skill to have when you’re faced with a possible apocalypse. In fact anything you can do to become self –reliant is a good idea. Since most people are prepping on a budget, concentrating on stockpiling food and other necessities, being able to save a bit of money on outbuildings can be extremely beneficial.
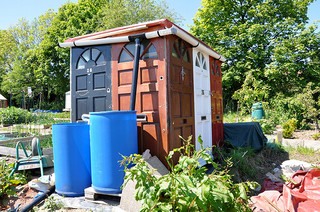
Photo courtesy of gordonplant
One way to build a shed or other outbuilding, such as a goat shed, chicken coop, hay barn or bunkhouse is to use wooden pallets. Not only are they plentiful, but you can often get them for a little bit of nothing. Since most are made of oak or other hardwood, they are going to be strong.
Some controversy exists about using pallets as some are treated with chemicals, but for most purposes, they are going to be perfect. For the purposes of these instructions, we are going to be using pallets that are 40 x 48 inches.
Build the Floor
Here’s how to build a shed. The first thing you need to do is build the floor. You can just use a flat space on the ground, using a shovel, level and rake to make it as level as possible. For a 10’ x 20’ building, lay out your pallets, three across and five lengthwise, with the 40 inch side on the narrow end, and the 48 inch length using the five, giving you a 10’ by 20’ footprint..
Next using seven sheets of plywood or OSB sheeting, cover the floor, trimming off the excess. Using wood screws or sheetrock screws, attach the flooring to the pallets. You could use nails, but since the pallet wood is so hard and dry, you may end up splitting the wood all too often. Now you’re ready to raise the walls.

You’ll need three pallets for each end and four pallets for each side for a total of twelve pallets. But that’s not high enough so you’ll need another twelve pallets to make your shed eight feet tall. If you use 40 x 48 inch pallets the side walls are going to be a little long so you’ll have to cut the pallet and seal the end with a 2 x 4.
It’s a good idea to stagger the pallets for strength so cut the pallets in half and alternate them a half pallet, then a full one, half pallet and a full one. Use 2 x 4’s to seal up the ends of the cut pallets.
Building the Walls
As you’re building the walls, you’ll want to leave room for a door to be framed in later with 2x4’s. When you’re first learning about building a shed, you may want to forego windows and just put in a door and keep it simple. Later as you become more proficient you can put in windows.
How to Build a Shed Roof
When it comes to building a shed you may be tempted to take the easy way and make the roof flat but you’ll regret it as soon as rain or snow comes. Your roof should be the same dimensions as your floor. Use 2 x 4’s to build up one side of your shed by 6-8 inches, use another 2 x 4 to cap the top of the walls .
Next use more lumber to create rafters or trusses across the roof. Once those are up, you can cover the roof with plywood, making sure the plywood overhangs the walls by at least four to eight inches.

Instead of plywood, you might also cover it with corrugated metal and give it a six to eight inch overhang so both snow and water runs off and away from the wall. Using the corrugated metal provides the opportunity to install rain gutters and have a rain catchment system.
Siding the Walls
The last thing you will need to do when learning how to build a shed is how to cover the inside and outside with sheets of plywood or even with felt roofing paper and shingles, or regular siding.
The inside ones are optional but if you do put sheets on the inside it will be a lot warmer inside. You also have the choice of putting insulation between the sheets of plywood on the walls.
Once you’ve built your first pallet building, you will discover that you will soon be coming up with other structures to build on your property to enhance your family’s ability to be self-sufficient and to survive no matter what.
Return from How to Build a Shed to DIY Projects


New! Comments
Have your say about what you just read! Leave me a comment in the box below.