DIY Food Dehydrating
Save money and space by learning DIY food dehydrating techniques to remove moisture from food, allowing preservation of the food for consumption later.
Water contained in fruits, vegetables and meat is conducive to rapid ripening and eventual decay due to the consumptive activity of enzymes and bacteria. When water is removed by dehydrating, or circulating dry, hot air through a food item, the food is reduced in size and the removal of moisture, which promotes decay.
Food Dehydrating Benefits
- Once canned food is open, it must be used within a short period or the contents will spoil. Dehydrated food containers can be opened and accessed repeatedly without worrying about spoilage because they contain no moisture to promote decay.
- Garden-grown food can be dehydrated, providing you and your family with nutritious and chemical-free food for survival purposes. Dehydrating food also lets you create your own long-term grocery as long as you continue growing food or raising livestock.
- Instead of only purchasing a small amount of perishable food when it is on sale at your local store, you can now take advantage of sales by buying larger amounts and dehydrating the food before it spoils.
- Save space in your food pantry by dehydrating bulky vegetables or fruits such as peppers and apples. A one quart jar will hold 25 dried apples or dried peppers.
- DIY food dehydrating techniques only slightly affect vitamin and mineral content of foods when performed at home. In fact, food dehydration is nutritionally better as a food preservation method than freezing or canning. While most vitamins are retained during the process, a minimal amount of vitamin C may be lost because this vitamin is water soluble.
- All dehydrated vegetables and fruits keep their carbohydrate and fiber content.
- Dehydrated foods are lightweight, space-saving and can be packed in survival backpacks for easy transportation when necessary.
Pre-Treating Foods
Although pre-treating food is not necessary prior to DIY food dehydrating, certain options such as marinating, dipping, sulfuring and blanching will enhance the flavor, texture, and color of some foods. In addition, altering the protein enzyme structure of food with pretreatment methods will cause a chemical reaction further inhibiting mold or yeast growth. Sulfuring is a way to retain the fresh color of certain foods since the drying process often lightens a food's color and makes it appear less appetizing. This pretreatment is commonly used when DIY food dehydrating outdoors using the sun and wind.
Food Dehydrator
Dehydration units equipped with drying chambers that force air through food is one method of drying and preserving food. However, purchasing a dehydrator is not necessary to effectively dry food, as other homemade techniques work just as well.
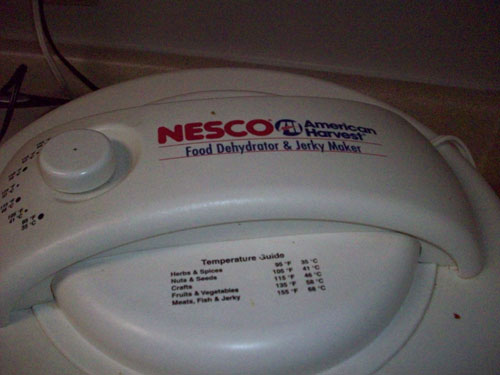
An electric food dehydrator should have a temperature control, trays with plenty of ventilation access, and a fan to circulate the air. Some units will have an on-off switch; others must be unplugged to turn off the power. Prices range from just under $50 for an American Harvest brand to several hundred for the crème-de-la-crème of dehydrators, the Excalibur.
If youre lucky you may find a gently-used food dehydrator at a thrift store or garage sale for under $10: a great deal!
Solar Food Dehydration
A DIY food dehydration system utilizing the sun's radiation consists of a wooden box fitted with a glass top that traps heat inside the box when solar radiation infiltrates the box through the clear glass. Additionally, this type of dehydrator can have a heat-absorbing plate inside that produces an air convection current passing through a vent built into the bottom of the box which diffusely heats the food. Food is effectively dried out as the hot air transports the moisture out of the box.
Drying food outdoors in the sun has many benefits:
- Dries more quickly than when using an electric dehydrating unit
- Easy to set up, use and clean — also portable
- Keeps food dry when it rains
- Air-tight construction prevents insects from entering the box
- Does not contribute to energy costs
- Dehydrating can begin in the spring as soon as early season crops such as strawberries, peas and blueberries are ripe
DIY Food Dehydrating in the Oven
Using an oven is also an effective DIY food dehydrating method that works best for making banana chips, drying meat jerky or preserving extra produce such as mushrooms and celery.
Oven drying takes longer than sun drying or using an electric dehydrator, and cannot be performed with ovens that are not equipped to produce temperatures at or below140 degrees Fahrenheit. If your oven does not go this low, it may cook the food instead of dehydrating it.
When drying food, place trays on oven racks that are two inches apart to promote proper air circulation and encourage moisture removal.
DIY Food Dehydrating in Your Car
With the exception of the solar food dehydrator all of the above methods require power. However, following an apocalyptic event, power may not be available. Therefore, you should know that in the summer, you can turn that obsolete (no power = no gas = not driveable) vehicle into a giant food dehydrator.
Use scrap wood and window screen or hardware clothe to create drying trays. Load with your fresh fruit, vegetables, or thin slices of meat and cover the entire tray with cheesecloth (to keep off bugs). Then place those trays in your car or truck. Open the windows a bit to allow air to circulate, then close the doors and walk away.
Depending on your location and the level of humidity in your area, most things will be completely dehydrated by the end of the day. If they are not totally dry, and the meat may not be, either bring everything in for the night or leave them in the vehicle, making sure to close the windows to protect the drying food from overnight moisture.
DIY Food Dehydrating in Your Greenhouse
Have a greenhouse that is just too hot to use in the summer? Using the trays described above, you can turn your greenhouse into a giant food dehydrator. Just remember to cover the food to protect from insects.
People have been dehydrating food since long before electricity, so with a little ingenuity, you too can employ this method of preserving your fresh produce and meat. Having this ability may be the only way to ensure that your family has food to get through the winter when its too cold to work the garden.
Return from DIY Food Dehydrating to DIY Survival Food


New! Comments
Have your say about what you just read! Leave me a comment in the box below.